 Skip Navigation
As The Tech Challenge progresses, participating teams and The Tech staff may discover that the rules must be updated. All changes will be posted on The Tech Challenge website, and registered teams will be notified by email regarding significant changes. Changes posted to the website will be labeled by date. Please check the website often for updates.

Rules and Rig

Rules
Rules in English
Updated on April 15, 2026

Safety Guidelines
Updated on March 16, 2026
Rules in Spanish
Updated on April 15, 2026
Rules in Vietnamese
Updated on April 15, 2026
Safety Plan Checklist
Construction sites need to have a safety plan to ensure that all the workers know how to use the equipment safely and protect themselves. So at the Showcase this year, we are having all teams fill out a Safety Plan checklist. Download and complete it ahead of time or plan to fill it out at the event.
Updated on April 16, 2026
Rig Drawings
Download PDF Video Tour of the Test Rig
See links above for Spanish and Vietnamese versions.
Updated on March 16, 2026
Updates to Rules
Safety
During device testing, the top priority is safety. Judges are authorized to stop any activity they view as unsafe. Teams are expected to handle and operate their devices safely. The judges’ word is final on safety-related issues.
Spirit of the Challenge
The Tech admires every student who tackles The Tech Challenge. We value your creative thinking and encourage teams to pursue surprising solutions that are better than anything we might imagine.
Remember that this is a challenge, not a competition. Teams work to beat the challenge, not other teams. Work together and keep trying when the going gets tough. Failures are a normal part of the process. Be ready to tell us about your journey, even the times when your team felt like quitting. Your journal, interview, and device demonstration do not need to be perfect to be amazing!
Tips for Testing at Home and School
Build your own test rig with the materials that you have available.
- It does not need to be made of wood or put on a table.
- Try to get the measurements of the rig as correct as possible so you can get accurate results when testing.


Sample Materials
- Chalk
- String
- Pencil
- Something to measure with (yard stick, tape measure, etc.)
- Paper (variety of sizes)
- Cardboard
- Scissors
- Optional: Canary cutter for cardboard
Build your rig with chalk on blacktop or concrete
For a more portable rig use paper or cardboard
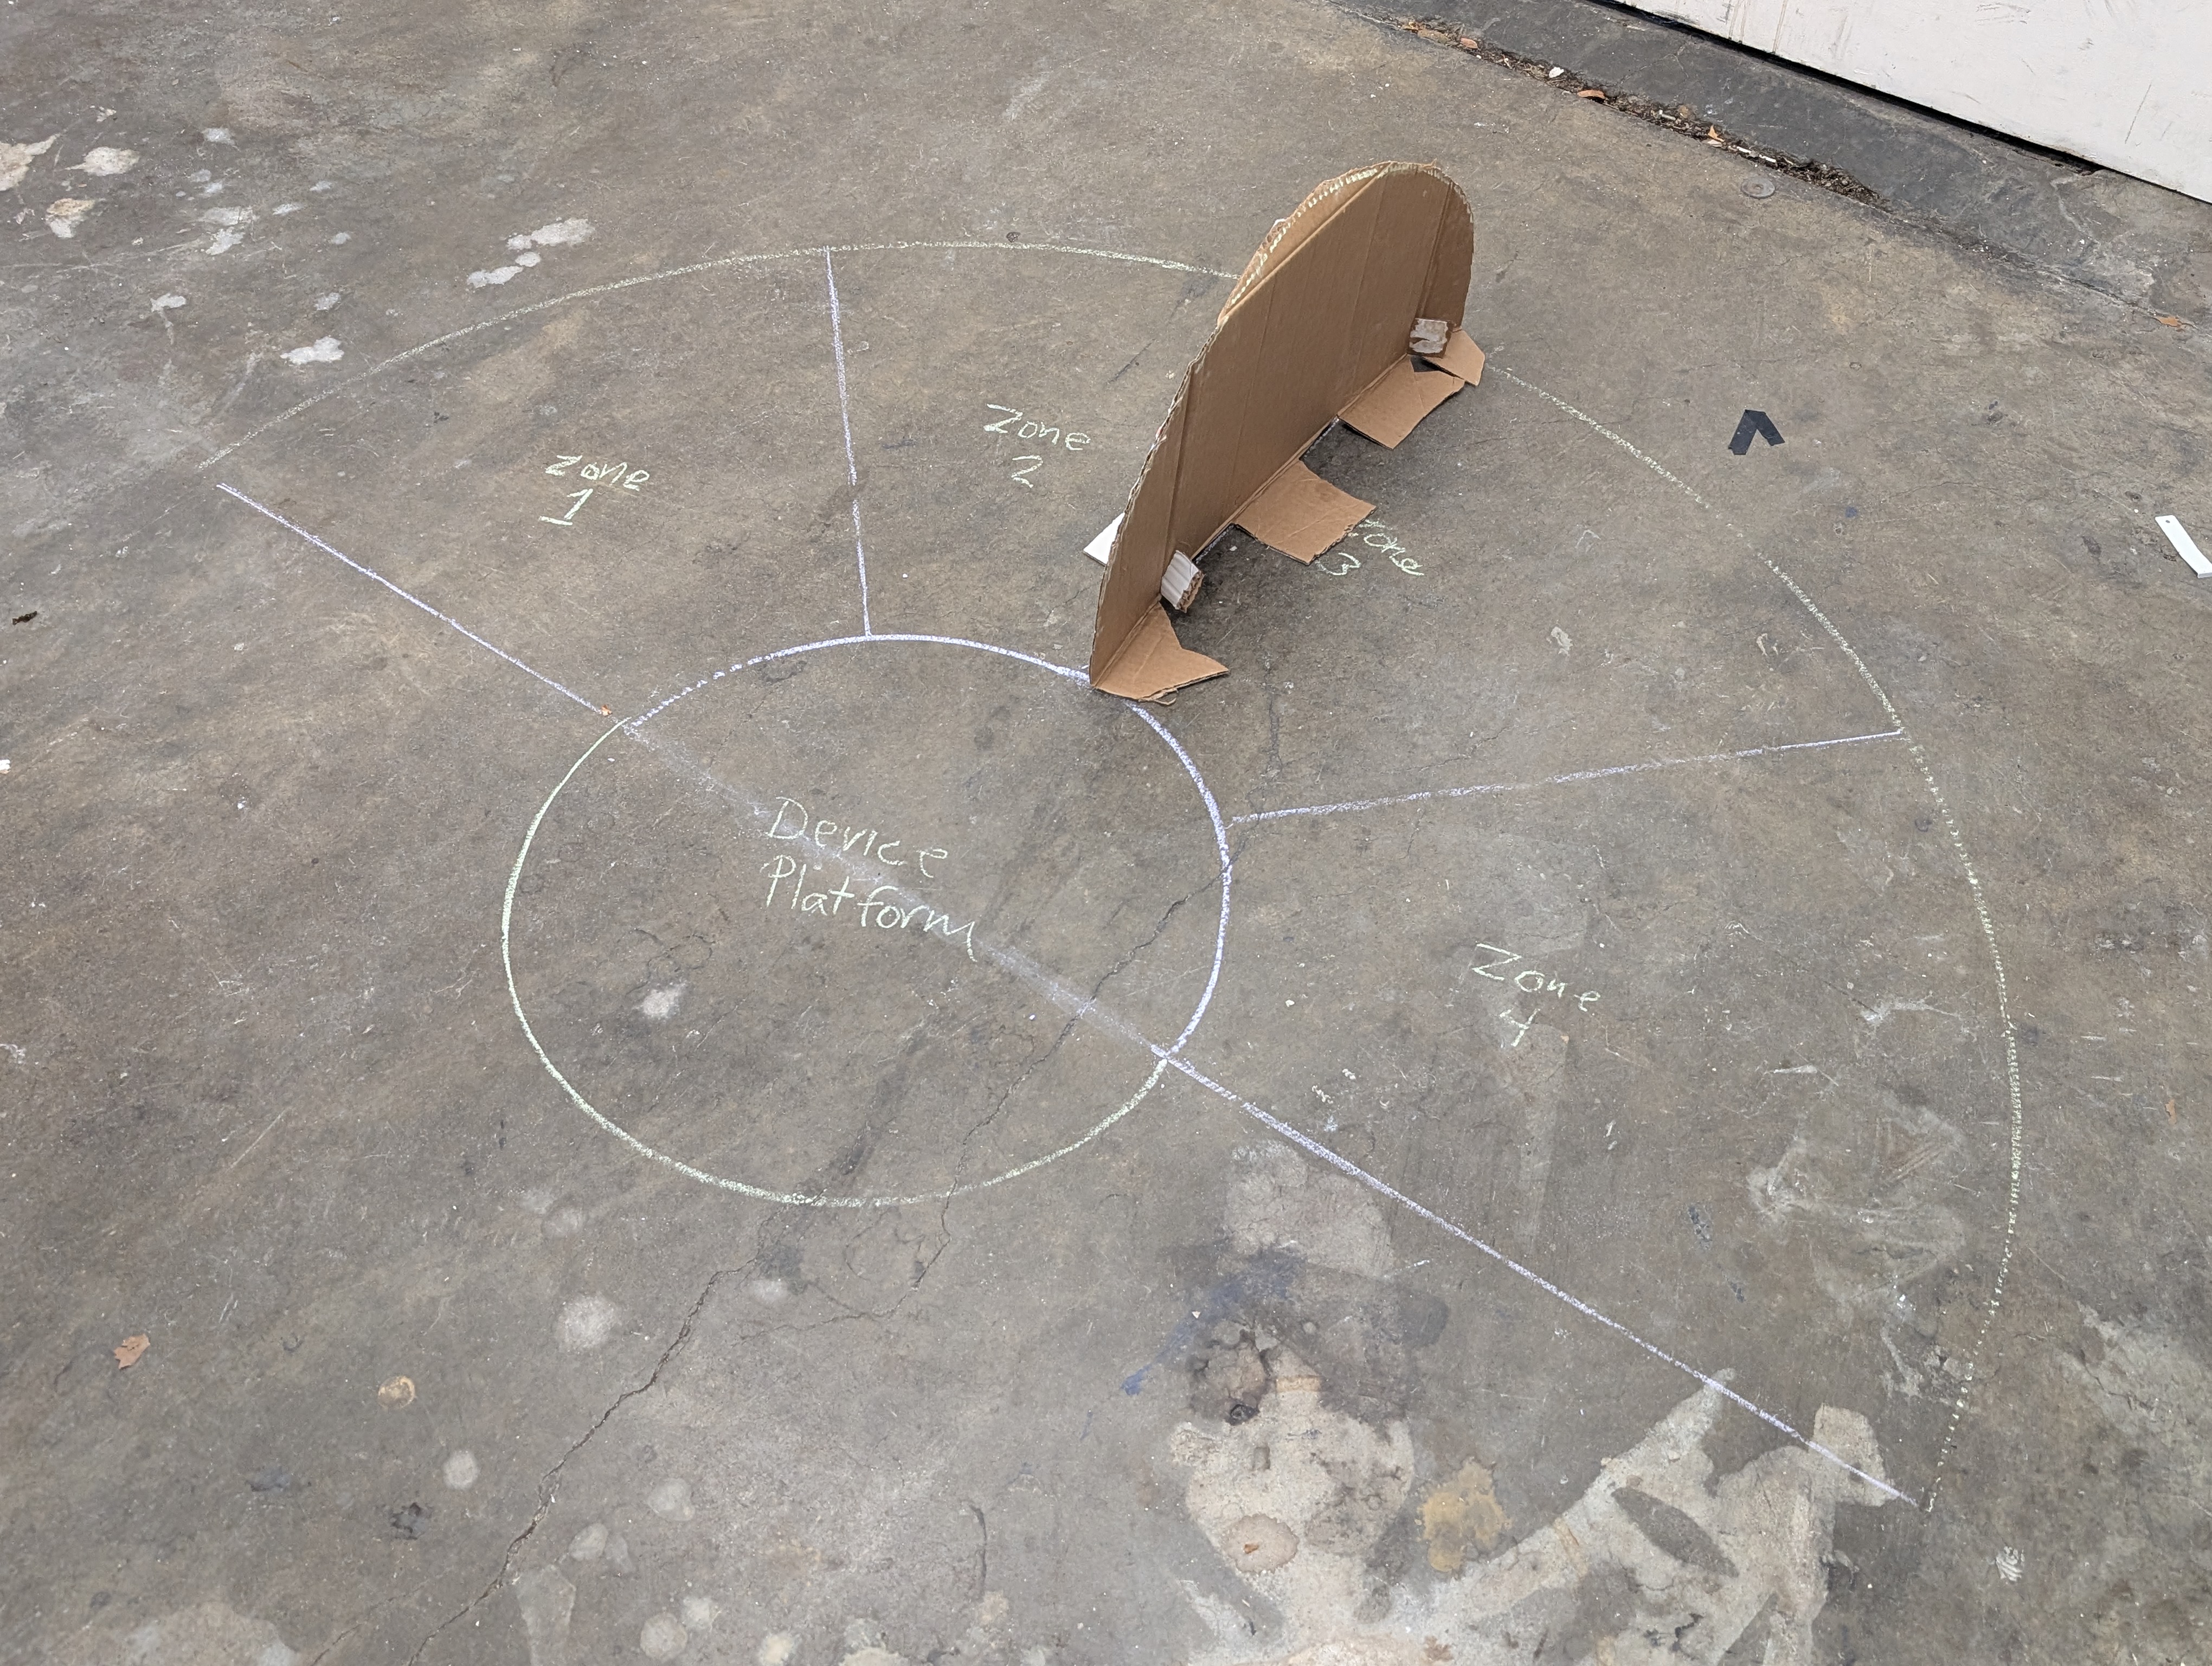
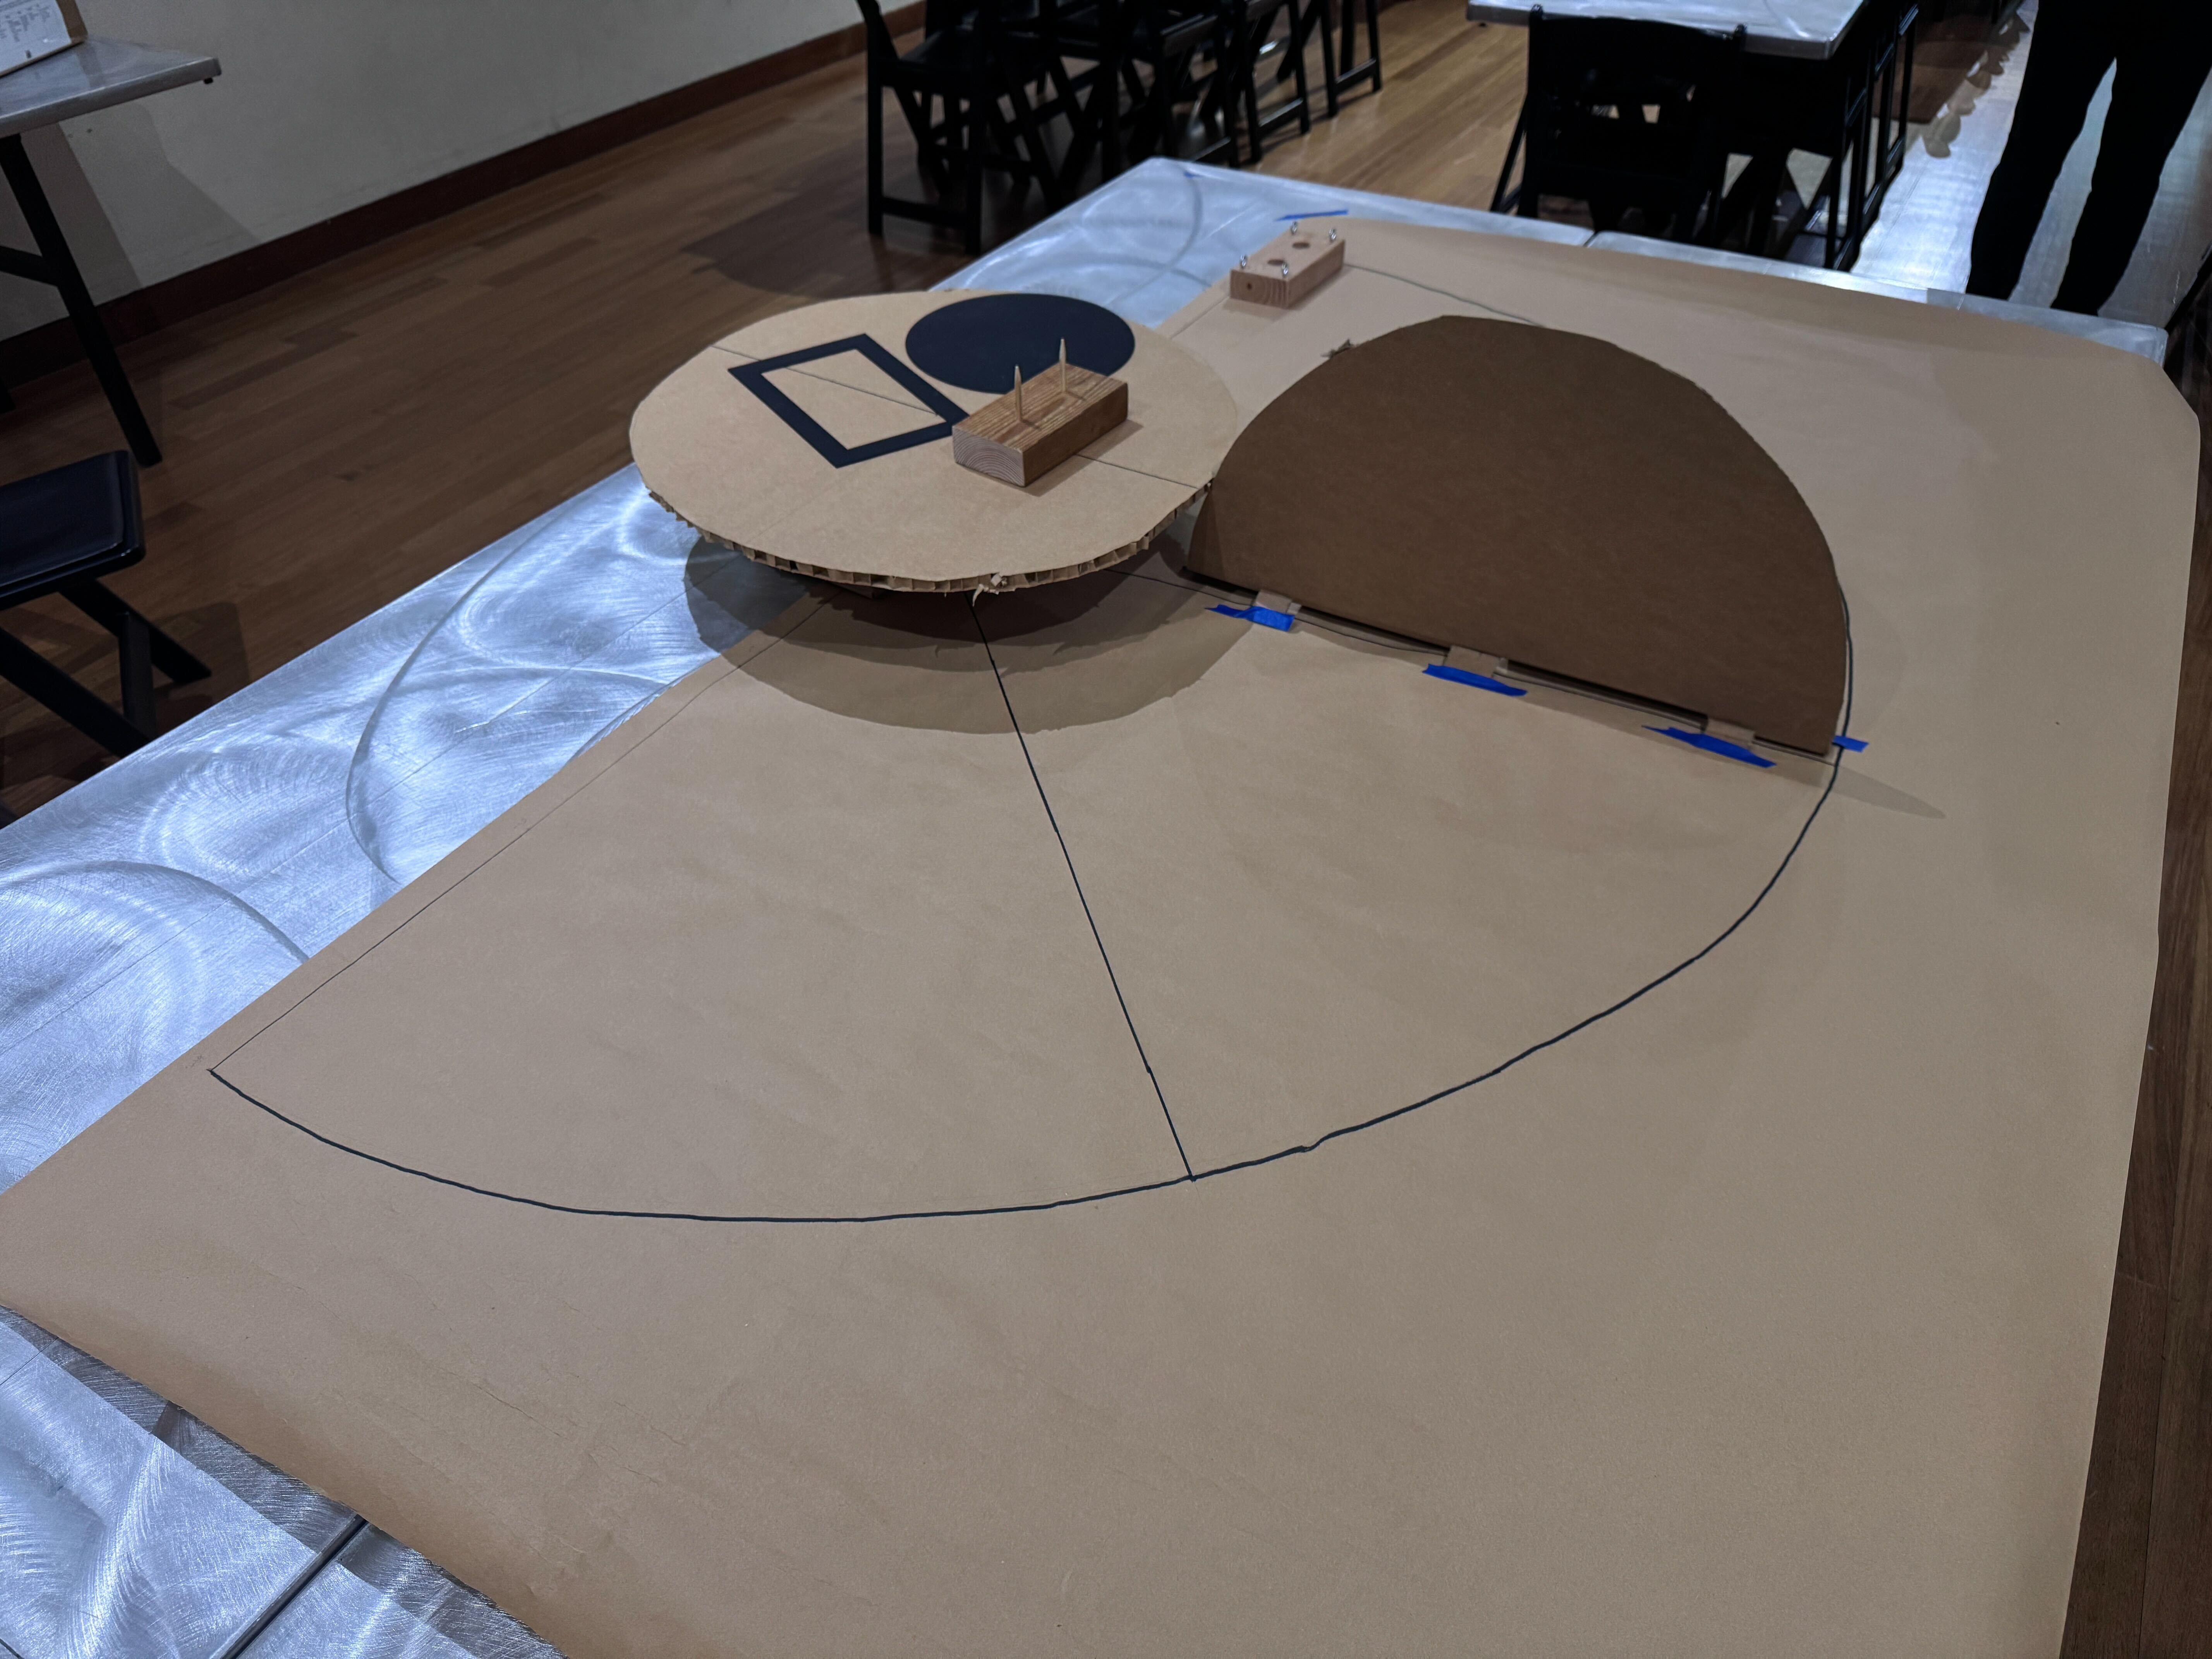
Creating the Work Area
-

1/4 items
- Begin by making sure you have a 7 ft. by 4 ft. space to place your rig.
- Use a pencil to draw a 6 ft. horizontal straight line on the bottom edge of your surface.
- Mark the half-way point of the line (3 ft.).
-

2/4 items
Use the string compass method outlined below to draw the half-circle shape of the work area.
-

3/4 items
From your 3 ft. center point, draw a vertical line that splits the half-circle in two zones.
-

4/4 items
- To create the lines that show the other zones, fold a piece of paper in half diagonally along the long side. This will create a 45 degree angle.
- The 45 degree angle can be used to measure out the 4 zones of the half-circle base.
String Compass
You may have noticed that this year’s rig includes a lot of circles and half-circles. We recommend using a string compass to measure out these shapes.
To create a string compass
- Tie one end of a string to your writing utensil (pencil, chalk, etc).
- Measure the string to the radius of your circle.
- (ex: the radius of the work area is 3 feet)
- Secure the other end of your string to the surface using tape.
- Stretch the string out until it is taut to trace the curve of the circle.
![]() Tips
Tips
- Have a team member help you by holding down the string while you trace the circle.
- Drawing quarters of the circle at a time and then connecting them together may be easier than trying to trace all the way around
- When drawing, be sure to hold your writing utensil. as straight up as possible.
Device platform
The device platform will need two sections. The circular base and something to raise it 4 inches off the work area.
| Circle | 4 inch stand |
|
Place the circle on top of any 4 in. item(s) that you have, such as:
|
![]() Tips
Tips
- Draw an X of perpendicular lines on the circle to align the Platform with the bottom of the rig.
- Heavier devices may require a more stable platform:
- Try choosing a stand that is at least 1 foot wide.
- Or attach the circle to your stand.
Obstacle
We recommend using cardboard to create the obstacle.
- Start by making a 2 ft. horizontal line on the cardboard.
- Create a string compass with a 1 foot radius and trace a half-circle on the cardboard.
- Draw five 4 in. tabs into the straight part of your half-circle obstacle.
- Cut out your half-circle and tabs using a cutting tool.
- Fold the tabs and tape them to the base to make the cardboard obstacle stand up.
![]() Tip
Tip
Check out our Paper Engineering activity for more tips on making paper and cardboard three dimensional.
Targets
- The large and small targets placed in zones 2 and 3 can be made from cardboard, cardstock, or even paper.
- See the Rules for target measurements.
- The stack targets may be most useful to develop from pieces of wood.
Tip: Pre-drill your holes before inserting pegs

Spread the Word
Use this marketing kit to share information about everything from registration to volunteering!